


Terminating an Ethernet cable might sound like rocket science. But once you get the hang of it, it's like tying your shoelaces. If you're setting up your home network or just trying to connect two rooms with a cable, you’ll probably deal with an RJ45 pass-through connector.
And yes, even without fancy gear, you can do it. This guide is a simple walkthrough that shows how to terminate an Ethernet cable using unshielded pass-through RJ45 connectors. Let’s roll up our sleeves and dive into the basics.
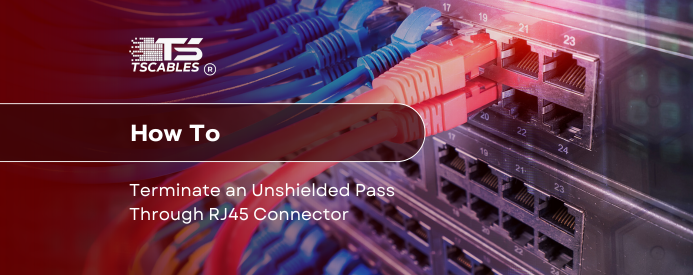
What is an Unshielded Pass Through RJ45 Connector?
An unshielded pass through RJ45 connector is a small plastic plug used to attach an Ethernet cable to a device or a wall jack. The “unshielded” part means it doesn't have any metal protection around it. This type is common in home and office networks where there's not much electrical noise or interference.
The “pass through” part is the key as it allows the wires to stick out through the end of the connector before crimping. Why does this matter? You can visually check if each wire is in the correct spot, following the RJ45 connection order exactly.
These connectors are a favorite among installers and beginners alike. They reduce the chance of mistakes during LAN cable termination, which helps avoid connection issues later on. Here are the benefits of an unshielded pass-through RJ45 connector:
- Easy to verify wire alignment
- Faster termination process
- Reduces wiring mistakes
- Great for home network setups
- No special shielding needed
- Ideal for low-interference areas
- Works with standard crimp tools
Tools Needed to Terminate an Unshielded Pass-Through RJ45 Connector
Before jumping into the process, you need the right tools. Having the right tools by your side ensures that there is no interruption in the process. Here’s what you’ll need:
- A Cat 6 termination kit or Ethernet termination kit
- Pass-through RJ45 connectors
- A crimping tool (designed for pass-through connectors)
- Wire stripper or cable cutter
- A male-to-male Ethernet connector (for testing purposes)
- Optional: Ethernet termination box for wall installations
These tools help ensure a tight, clean connection that works the first time. This list ensures that you have all the relevant tools you need right by your side when terminating an unshielded pass-through RJ45 connector.
Step-by-Step Process to Terminate an Unshielded Pass-Through RJ45 Connector
Let’s break this down step-by-step. Each section below will guide you through the exact method, from prepping your cable to making sure it clicks into place.
Step 1 - Cut and Strip the Cable Jacket
The first thing that you need to do is start by cutting your cable to the desired length. Use your wire stripper to remove about an inch of the outer jacket.
You’ll now see four twisted pairs with eight wires in total. These are your color-coded lanes for data. This part is where LAN cable termination begins.
Untwist the pairs just enough so the wires can lie flat. Don’t go wild and untwist the whole thing. That can cause crosstalk, which in other words means “bad signal.”
Step 2 - Arrange the Wires in Correct Order
Here’s where most people trip up. You have to follow the RJ45 B wiring or RJ45 A or B layout. Most common is RJ45 termination B, also known as T568B. Here’s the RJ45 connection order for T568B:
- White/Orange
- Orange
- White/Green
- Blue
- White/Blue
- Green
- White/Brown
- Brown
Make sure the wires are flat and straight. This layout is also used in most RJ45 network wiring setups.
Step 3 - Trim Wires and Insert into the Connector
Now trim the wires so they’re all the same length. Leave just enough so they stick out through the end of the RJ45 end when inserted into the pass-through connector.
Push the wires into the connector. They should slide easily, each fitting into its channel. The copper should poke out slightly from the tip of the connector. That’s the beauty of RJ45 pass-through connectors, as you can check alignment before crimping.
Step 4 - Crimp the Connector
Slide the connector into your crimping tool and give it a good squeeze. You’ll feel the tool bite down and press the contacts into the wires.
This step locks the RJ45 plug pinout and trims the excess wire in one go.
Double-check that the outer jacket is inside the connector, too. This helps with cable strain—prevents accidental pull-outs.
5. Test the Connection
Last step, but one you should never skip: testing.
Use a male to male ethernet connector and plug both ends into a cable tester or a switch/router and device. You’re testing the RJ45 LAN cable connection for good signal flow.
If you don’t get a solid light on all pins, start over. Something went sideways, for instance, a wire order or a weak crimp.
Conclusion
Making a solid Ethernet cable termination isn’t hard, but it demands some patience. If you follow these steps, you’ll never be left with flaky internet again.
Want quality connectors and tools? Check out TS Cables for trusted cable termination in networking solutions and more.
FAQs
What is the difference between T568A and T568B?
T568A and T568B are two wiring standards. T568B is more common in home setups and routers.
Do I need a shielded connector for every setup?
Not always. Use RJ45 shielded pass-through connectors only when shielding is needed, like outdoor cables.
Can I use the same method for Cat5e and Cat6?
Yes, but CAT 6 termination kit tools are usually more precise for tighter wire spacing.
Is it okay if the wires don’t poke out of the connector tip?
No. With pass-through connectors, exposed wire ends help ensure correct alignment before crimping.
How long can a terminated cable be?
Keep your RJ45 ports connected within 100 meters (about 328 feet) for reliable signal quality.

